Creating and sharing NuGet packages in a team
There is always more development work to do than there is time to do it. This year I have been focusing on improving my development efficiency. Specifically, one of my goals has been to take advantage of more opportunities to reuse code.
In my JavaScript work I’ve encountered many useful modules from Sindre Sorhus. Wondering how he is able to be so productive led me to this post, where he explains that one of his tricks is to write small, focused modules to avoid ever solving the same problem more than once. This approach not only saves time, but also leads to better code organization since multiple solutions for the same problem, e.g. file storage, aren’t scattered across projects.
Here’s how I’ve implemented small, focused modules for C# for my team in the form of NuGet packages using Azure DevOps, using an example project called IceCreamLibrary.
Contents
- Create a .NET Standard class library
- Add NuGet package info
- Create DevOps project and push code
- Create publish pipeline
- Consume feed
- Use package
- Releasing updates
- Conclusion
Create a .NET Standard class library
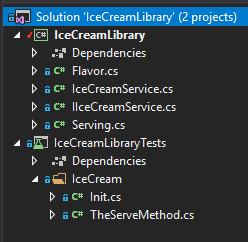
First, create a package to share. For maximum compatibility with .NET projects, make it a .NET Standard class library. Be sure to initialize a Git repo in the solution directory.
In this case I created a super-simple IceCreamService that provides a Serving of ice cream given a number of scoops and a Flavor:
namespace IceCreamLibrary
{
    public class IceCreamService : IIceCreamService
    {
        public Serving Serve(int scoops, Flavor flavor)
        {
            return new Serving
            {
                Scoops = scoops,
                Flavor = flavor
            };
        }
    }
}
Notice that IceCreamService implements the IIceCreamService interface. It’s important to provide interfaces for shareable packages so that consumers can depend on the interface instead of your concrete implementation, which will enable them to mock your package so they can write unit tests for their code that depends on it.
Add NuGet package info
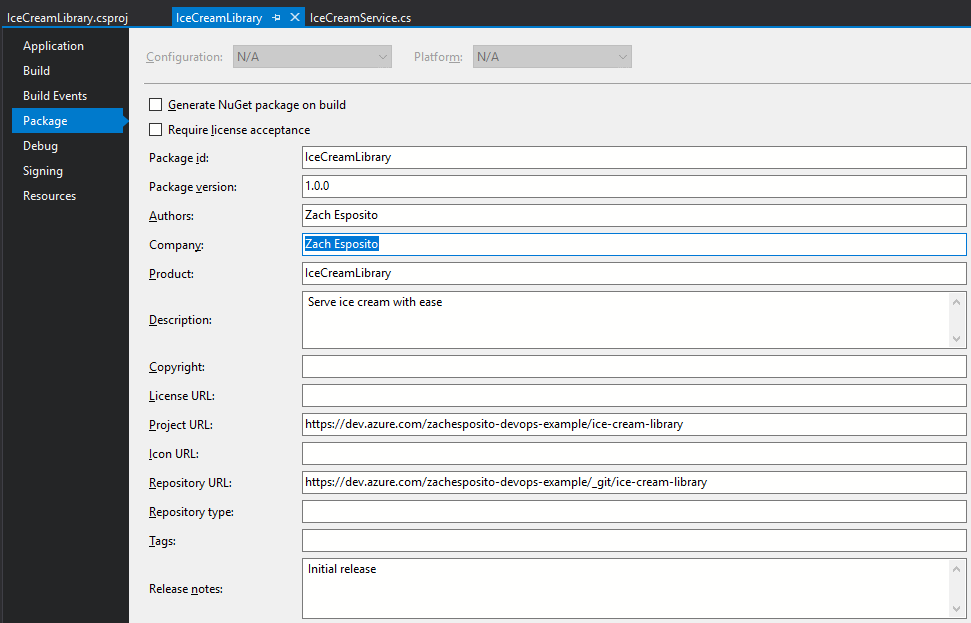
In the .csproj file, in the PropertyGroup element, add the following required metadata:
- PackageId - the name of the package, unique to the feed it will be served from
- Version
- Author
<PropertyGroup>
    <TargetFramework>netstandard2.0</TargetFramework>
    <PackageId>IceCreamLibrary</PackageId>
    <Version>1.0.0</Version>
    <Authors>Zach Esposito</Authors>
    <Description>Serve ice cream with ease</Description>
    <PackageProjectUrl>https://dev.azure.com/zachesposito-devops-example/ice-cream-library</PackageProjectUrl>
    <RepositoryUrl>https://dev.azure.com/zachesposito-devops-example/_git/ice-cream-library</RepositoryUrl>
    <PackageReleaseNotes>Initial release</PackageReleaseNotes>
  </PropertyGroup>
See here for a list of other metadata you can add, such as RepositoryUrl or PackageReleaseNotes. If using Visual Studio, you can also provide metadata via the Package tab in the project’s Properties screen:
Create DevOps project and push code
Create a new project in Azure DevOps, then in the Repos tab click Clone:
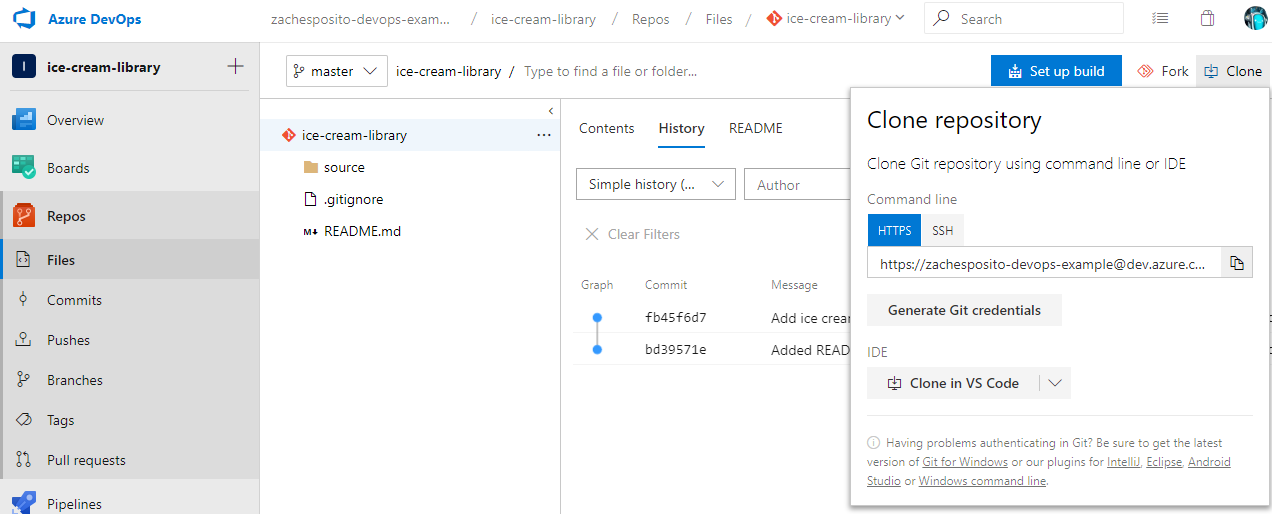
Add the clone URL as a remote in the IceCreamLibrary’s local repo and push the code to it.
Verify Artifacts feed exists
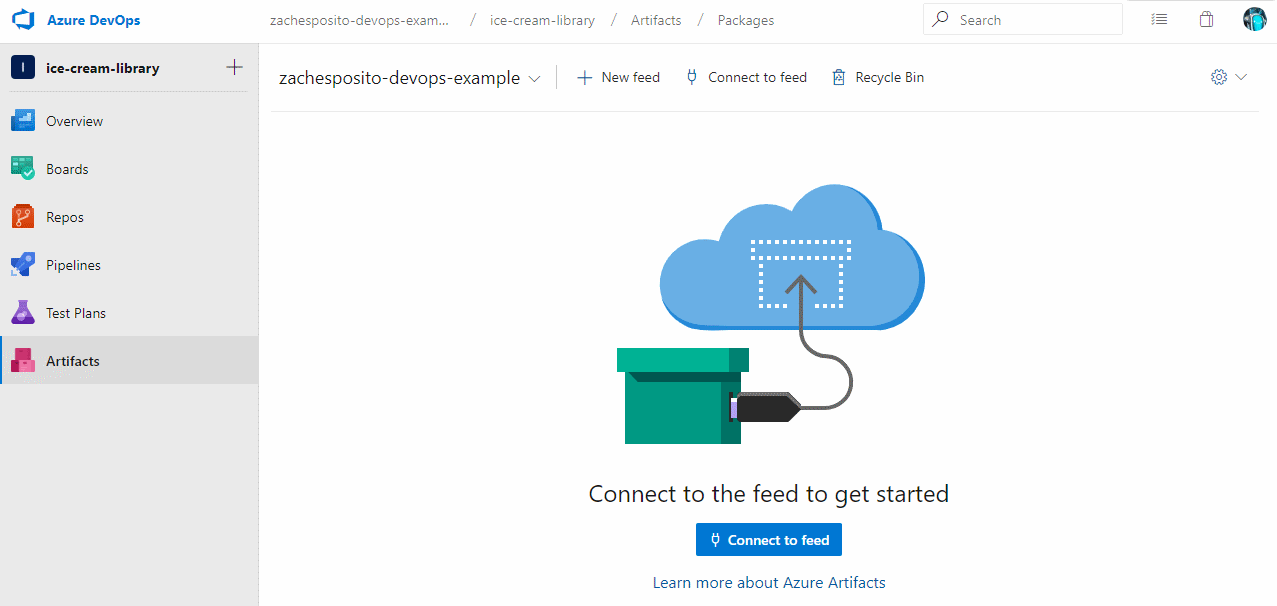
In DevOps, under the Artifacts tab, a default feed named after your organizaztion should already exist. If not, click + New Feed at the top to create a feed.
Create publish pipeline
In DevOps, under the Pipelines tab, click Builds, then New pipeline.
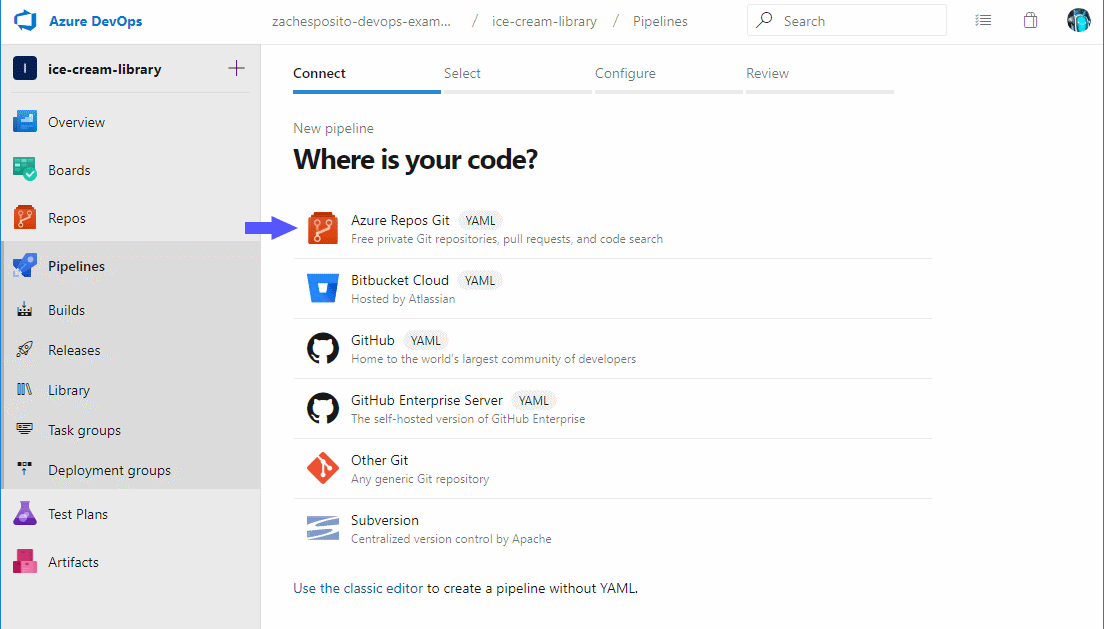
On the Where is your code? step, choose Azure Repos Git:
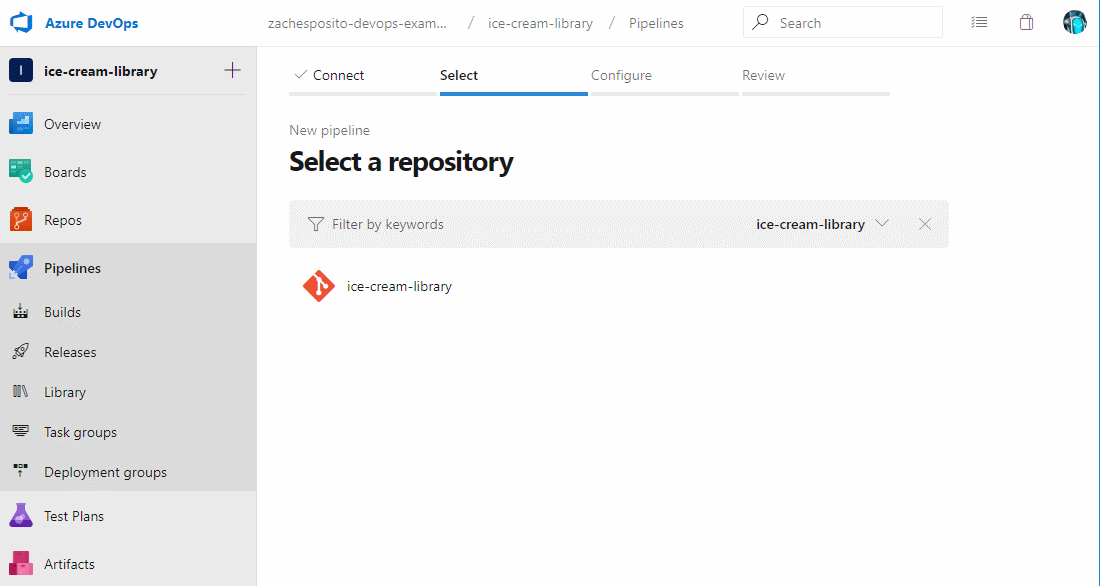
Then select the IceCreamLibrary’s repo:
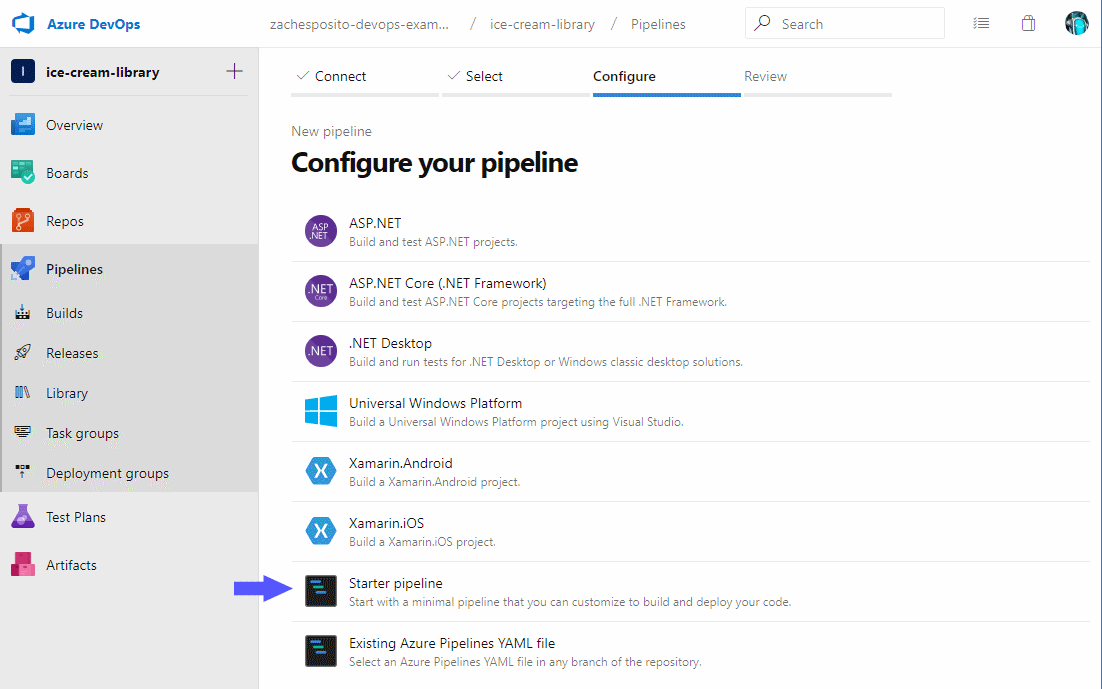
On the Configure your pipeline step, choose Starter pipeline:
On the Review your pipeline YAML step, replace the existing YAML with the following:
trigger:
- master

pool:
  vmImage: 'ubuntu-latest'

steps:
- task: DotNetCoreCLI@2
  displayName: 'dotnet build'
  inputs:
    projects: '**/*.csproj'

- task: DotNetCoreCLI@2
  inputs:
    command: 'test'
    projects: '**/*[Tt]ests/*.csproj'
    arguments: '--configuration $(BuildConfiguration) --no-restore'

- task: DotNetCoreCLI@2
  displayName: 'dotnet pack'
  inputs:
    command: pack
    packagesToPack: source/IceCreamLibrary/IceCreamLibrary.csproj

- task: DotNetCoreCLI@2
  displayName: 'dotnet push'
  inputs:
    command: push
    publishVstsFeed: 'zachesposito-devops-example'
Let’s walk through each part of the pipeline definition:
trigger
Says to run this pipeline whenever commits are pushed to the master branch.
pool
Configures the environment in which the pipeline will run. In this case the operating system will be Ubuntu.
steps
Defines a series of .NET Core CLI tasks to run:
dotnet build
Builds all projects, specified via wildcards.
dotnet test
Runs all tests, assuming that any test projects’ names end in “Tests”. The --no-restore option is used to disable restoring NuGet packages again, since they were restored in the previous step during dotnet build.
dotnet pack
Creates a NuGet package from the specified project.
dotnet push
Uploads the NuGet package created in the previous step to the Artifacts feed.
Now click Save and run. In the modal that appears choose Commit directly to the master branch for simplicity. For a real project you might want to set policies to protect your master branch, in which case you could choose Create a new branch for this commit and start a pull request.
The pipeline should run and complete successfully.
Troubleshooting
If the dotnet push task fails with an error like error: Response status code does not indicate success: 403 (Forbidden - User '<GUID>' lacks permission to complete this action. You need to have 'AddPackage'., then the account the pipeline is using might not have access to the Artifacts feed.
To fix its access, go to Organization Settings > Security > Permissions, then edit the Project Collection Build Service Accounts group, then on the Members tab add the build service account for your project (in this example it’s ice-cream-library Build Service):

Then, go back to the Artifacts tab, then go to Feed settings > Permissions, and add the Project Collection Build Service Accounts group with the Contributor role.

Run the pipeline again and the dotnet push step should succeed.
Consume feed
Now that the pipeline has run successfully and the package has been published to the Artifacts feed, it’s available for other projects to use. But, before the package can be downloaded, you must tell your development environment where to find it.
Add package source
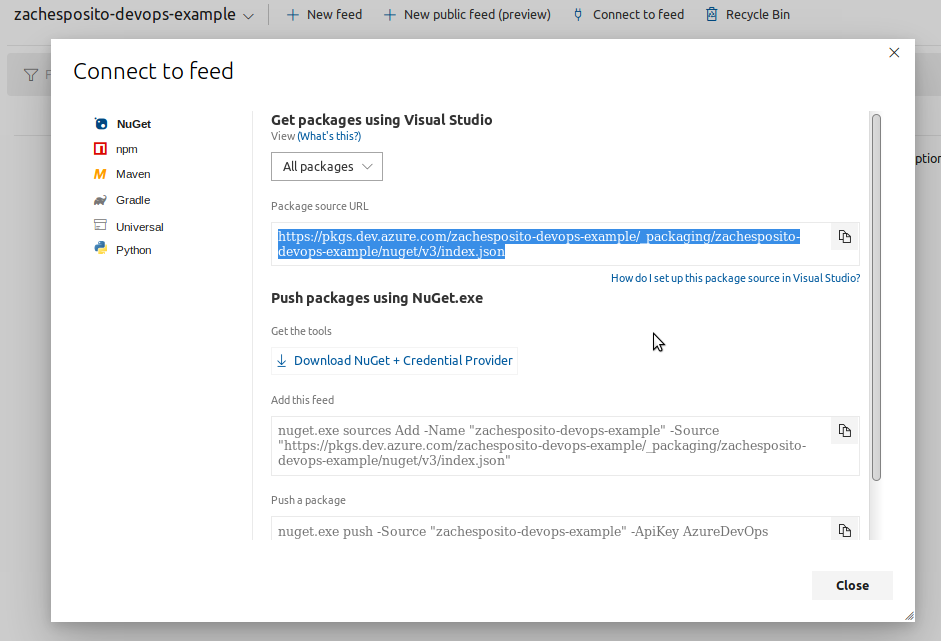
First, add a new NuGet package source to your development environment. Get the feed URL in DevOps by going to Artifacts > Connect to feed:
If using Visual Studio, in the menu go to Tools > Options and then find NuGet Package Manager > Package Sources (see Microsoft’s instructions for full details).
If not using Visual Studio, add the new source to the NuGet configuration file at <your user folder>/.nuget/NuGet/NuGet.Config. If the file doesn’t exist, create it. Here’s what the new package source should look like within the file:
<?xml version="1.0" encoding="utf-8"?>
<configuration>
  <packageSources>
    <add key="nuget.org" value="https://api.nuget.org/v3/index.json" protocolVersion="3" />
    <add key="MyDevOpsFeed" value="https://pkgs.dev.azure.com/zachesposito-devops-example/_packaging/zachesposito-devops-example/nuget/v3/index.json" />
  </packageSources>
</configuration>
Authenticate
After adding the feed, if using Visual Studio, simply log in using your DevOps credentials. If not using Visual Studio, install Azure Artifacts Credential Provider to automatically generate and use credentials when running dotnet or nuget commands that download packages.
Use package
Now that the new package source has been added, it’s time to use the IceCreamLibrary package.
Make a new .NET Core project. In this example I made a new console app called DessertBar.
With the new project created, add the IceCreamLibrary package. If using Visual Studio, you can use the Nuget Package Manager UI. Otherwise, in the project’s directory, run dotnet add package IceCreamLibrary. If this is the first time adding a package after installing the Azure Artifacts Credential Provider, append the --interactive flag to be prompted to log in to generate credentials.
After the package is installed, it can be referenced in code. Below is how I use IceCreamLibrary in DessertBar’s Program.cs:
using System;
using IceCreamLibrary;

namespace DessertBar
{
    class Program
    {
        static void Main(string[] args)
        {
            var iceCreamService = new IceCreamService();
            var serving = iceCreamService.Serve(2, Flavor.Chocolate);

            Console.WriteLine($"Serving contains {serving.Scoops} scoops of {serving.Flavor.ToString()}.");
        }
    }
}
Running the above should output Serving contains 2 scoops of Chocolate.
Releasing updates
The above example showed how to create and use IceCreamLibrary version 1.0.0. What if you want to release an update, such as bug fixes or new features?
The pipeline set up earlier makes releasing new versions super easy. Simply update the <Version> element in the project file with the new version number and push that to the master branch in the DevOps repo. Updating the master branch will trigger the pipeline again, which will build, test, and publish the new version to the Artifacts feed. After the new version is published, it will be available to download via Nuget Package Manager or dotnet add package.
Conclusion
The above example showed how to create a NuGet package, publish it to a private feed using an automatic pipeline, and how to consume the package in another project. Now you have the foundation for creating a collection of small, reusable C# modules for your development team, which enables greater code reuse, which can save a lot of time and increase productivity.